Gel nail extension has the consistency of hair gel used to apply on top of a nail extension or apply it directly onto the natural nail. It strengthens the nail and promotes nail growth.
The gel nails are different from acrylic nails because no mixture is required to make a gel. The nails are then cured under a UV lamp. It makes the nail extension strong.

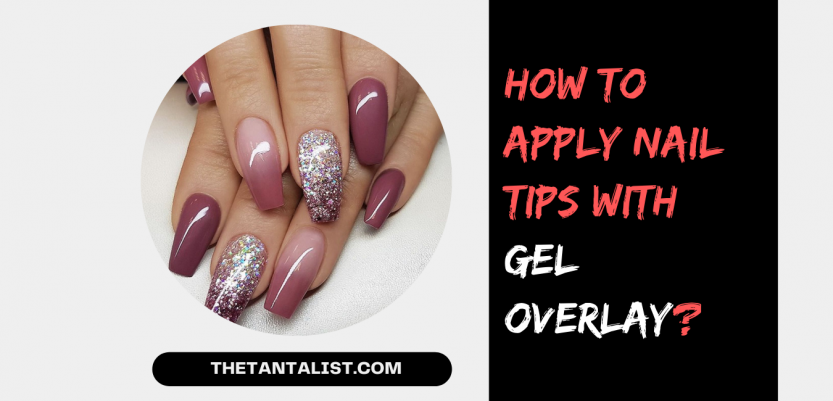
For fun and trendy look, gel overlay nails are a great add-on. But, salon appointments are either expensive or time-consuming; here’s how to apply nail tips with gel overlay easily at home:
Quick Tip:
To find all of your preferred beauty products, check our carefully selected list of premium beauty products include the latest in skin care, fragrances, nails, hair products, makeup, and much more.
Things Required:
Some of the things that you will need to apply for nail extensions at home are as follows:
- Acetone
- Cuticle pusher
- Cotton pads
- Nail buffer block
- Gel cleanser
- Clear nail tips
- Nail file
- Nail glue
- Manicure brush
- Primer gel
- Finishing gel
- Hard or soft gel
- Brush
- UV or LED lamp
Step by Step Guide:
The gel nail product you will choose usually comes with a specific manual with all the instructions; it is best advised to refer to their instructions.
Here we are going to simply the things for you by providing simple steps to apply nail tips with gel overlay at home:

- Step 1.
To apply nail tips with gel overlay, start with cleaning your nails.
Before starting with the steps, make sure your nails are polish-free. You may use acetone or nail polish remover to get rid of old nail polish traces.
After that, wash your hands properly.
- Step 2.
Now, push back the cuticles with the help of a cuticle pusher. Gently press a cuticle pusher against the cuticle skin, allowing you to expose your natural nail so that the gel nails stick well and last longer.
A plastic or metal cuticle pusher is available in the market, but if you don’t have time looking for it, an orangewood stick will work just fine to push back your cuticles. You may also trim your nails to any length you want.
After you are done with prepping your nails apply cuticle oil.
- Step 3.
You will have to buff up on the area of your natural nails with the help of a buffer block.
Begin by holding the block to each nail and make sure you start with parallel strokes, then gently rub the block on your nail. You will have to keep buffing your nails until the surface on the nails appears slightly dull.
This step will roughen up the shiny and smooth texture on the nail and help the gel stick properly.
- Step 4.
Before applying nail tips with gel overlay, get rid of any dust on your nails. You need not require acrylic overlay on press-on nails, as these are temporary but great to look at.
After you have managed to buff up your nails with a gentle cleanser, wipe your nails and remove the oil or dust. With the help of a cotton pad and cleanser, rub across each nail.
- Step 5.
Once you are done cleaning your nails, pick a precise nail tip as per your desired length and shape like an almond, square, coffin, rounded, oval, etc.
These shapes come in various lengths like short, medium, long or extra-long.
- Step 6.
After selecting the type of nail tip, you must assign a tip that perfectly fits the width of your natural nail.
Then with the help of nail glue, stick the tips on the ends of your natural nails. You will have to brush a tiny amount of glue properly on the underside of the nail tip, then press it well down onto your natural nail tip.
You will need to hold the tip in place for about 10 seconds to ensure that the tip is secure. Repeat this process for the rest of the nails.
- Step 7.
Again with the help of a cotton pad and cleanser, wipe down each nail to remove dust.
Then with a manicure brush, swipe off gently to remove any remaining dust or residues from your nail.
- Step 8.
In this, step you will apply nail tips with gel overlay.
Begin with a primer gel with the help of a flat brush. You will need a narrow and flat brush to scoop up a small amount of primer gel. This will be your base coat, and you will have to apply it in a thin layer on each of the nails.
- Step 9.
To secure the primer gel, you will need to cure it under a UV or LED nail lamp.
The curing time for the primer gel will depend on the type of gel you are using. It is usually recommended to use the curing time as per the manual procedure.
The UV lamp takes about 2 minutes to cure, which is slightly longer than an LED lamp. The LED lamp takes about 30 seconds or so, but both work just well.
- Step 10.
The next step after curing is to apply a second coat of the gel across your entire nail. This soft gel overlay coat should be thinner than the first layer. Distribute the gel evenly on each side of your nail using a brush.
After you are done with the second coat, cure it under the UV or LED lamp as per the previous step.
Once you have cured both the layers, you will be left with a top layer that is slightly sticky.
Remove the stickiness with a cotton pad and cleanser. Wipe the nails gently to get a smooth layer.
- Step 11.
Finally, file your nails according to the shape you want and then, with the help of a brush, dust off the nail. This will smooth out your nails if there are any imperfections.
Lastly, paint your nails with a topcoat with the help of a finishing gel overlay manicure and cure it under the lamp. Now, to further ease your search, we have listed the best Gel Overlays.
5 Best Overlay For Natural Nails
1. Kiara Sky French Starter Kit

- Give clients stronger, light weight and natural long-lasting nails
This is an easy-to-use dip overlay that provides lightweight and strong nails that are long-lasting and is best for beginners who wants to apply nail tips with gel overlay.
The Kiara Sky Dip System nail kit comes with a dip powder that feels natural and does not damage your natural nail. It is free from harsh chemicals and contains complex ingredients that keep your nails from discoloration and chipping.
2. NYK1 Nail Force Power Nail Builder Gel
NYK1 Nail Force Power Nail Builder Gel

- Repair and Growth Treatment for Cracked, Broken
If you are looking for the power gel to apply nail tips with gel overlay than the NYK1 nail builder is a sculpting nail builder that strengthens your nails and protects the growth. This acrylic overlay on natural nails fixes any damaged nails in less than a few minutes. If you have weak nails, this helps with both overlays and tips.
It has been formulated with a soak-off formula that is the perfect gel for building nails. To ensure smooth application, it also comes with a complimentary brush inside the package.
3. ibd LED/UV Builder Gel Pink

- Perfect for French manicure
Another great option for builder gels in the market is the new IBD builder gel formula specifically for LED/UV usage. It gives you the perfect french manicure making your nails look glamorous and you can easily apply nail tips with gel overlay for manicure.
Its special feature is that it cures fast under the LED light. It is one of the best overlays for natural nails as it can last for weeks, giving you the best option for manicures or pedicures at home.
4. MIA SECRET Clear Acrylic Nail Art System
MIA SECRET Clear Acrylic Nail Art System

- Provides an ideal consistency and activation time
These are quite a strong acrylic overlay on short nails. The MIA Secret comes with a liquid moniker along with the clear acrylic powder. These are an ideal option for at-home nail art as they are long-lasting.
This product is blended with a liquid monomer and is a non-yellowing formula to apply nail tips with gel overlay. The Acrylic powder prevents your nails from discoloration. This product is available in the color violet.
If you are a newcomer, it will just take a few practices, and after that, you’re going to get salon-quality nails right at your home.
5. Gelish Structure Gel

- Soak-Off Gel
This gel overlay price is quite reasonable for the quality it provides. You will love this product if you have brittle or thin nails and you wish to apply nail tips with gel overlay..
The formula allows you to grow the nails out naturally. A great addition to your nail care routine, Gelish Structure gel helps to strengthen your nails. Get glamorous nails right at the comfort of your home.
Frequently Asked Questions
- Can you stick nail tips on with gel?
Yes, you can stick nail tips with gel but, make sure that you don’t let the gel dry all the way; before applying the fake nail, wait for a few seconds. The gel sticks well if it is tacky rather than when it’s wet.
- Can you use UV gel as nail glue?
You can surely use UV gel as a glue since it’s a type of glue; hence it can be used as an adhesive.
- Is gel overlay good for your nails?
Gel overlays are more expensive than acrylics, even though they don’t last as much as acrylics cause less damage to your natural nails.
- How do you do gel overlay acrylic tips?
Wipe your nails before applying the gel overlay after every coat. Once you have done that, make sure you cure them under a UV/LED drying lamp to secure them.
Final Words
Gel nails can be difficult to work with initially, but once you practice and work with the right tools, these add just the right amount of appeal to your daily look.
Gel nails are a sturdy option but look extremely stylish.
For professional-looking nails and manicures at home, I would recommend you ibd LED/UV Builder Gel Pink. These are easy to work with and add the perfect amount of glam and length to your nails.
Share this on Pinterest:

Suggested:
- 30 Black Nail Ideas and Designs for your Winter Manicure
- 15+ Best Frosty Winter Nail Ideas to Try at Home
- 10 Easy Halloween Nail Art DIY Ideas You Definitely Try
- 25+ Swirl Nail Designs for an Unforgettable Manicure
- 50 Gorgeous Summer Nails Everyone is Recreating